Do you want a quick and easy way to make your own stencils? All you need is freezer paper, scissors, and the free SVG cut file included in this article. Check out these instructions for how to make these simple but stylish stencils!
Freezer paper is a blessing for crafters because it can make your life easier in more ways than one! You can use it to trace shapes without having to flip the pattern over (great for crafts like painting pumpkins), iron-on appliques to clothing, and even transfer images to wood. But freezer paper stencils are super easy and stylish, and they’re simpler than ever with this free SVG!
So grab your Freezer paper, the Pumpkin Spice free cut file, and your Cricut (or a craft knife) – these stencils are quick, easy, and totally doable for even the smallest of crafters!
What exactly are Freezer Paper Stencils?
What exactly are freezer paper stencils? They’re made from cutting shapes out of sheets of thick paper coated with a thin layer of wax on one side. Once you apply the stencil to your desired material and heat, the freezer paper coating will seal and create a bond that the paint won’t slip under (which sometimes happens with a piece of cardboard.) They can be used in painting or even as templates for things like making your very own t-shirts.
Freezer paper is mainly used by people who sew because it’s perfect for keeping fabric from fraying along the edges, but it also has a few other uses. For this tutorial, you can pick up a roll of freezer paper at your local grocery store or department store near the aluminum foil and wax paper. I bought this one from Amazon! You’ll also need a pair of scissors or a Cricut digital cutting machine and the free SVG included in this article.
To make freezer paper stencils, you’ll need one of the free SVG files that you can find in the Tried & True Creative Library. Not a member yet? Just enter your information below to gain access! I may be partial, but I think it’s a convenient free resource library!
Pumpkin Spice Free SVG Cut File
People love pumpkin spice for many reasons. They love that it smells great and tastes even better! And let’s not forget that it has some incredible health benefits too!
For one thing, cinnamon is a powerful antioxidant that can help reduce symptoms of arthritis and rheumatism. It’s also been proven to lower cholesterol levels and blood sugar because it changes how your body metabolizes carbohydrates. Pumpkin spice also contains high amounts of fiber, vitamin C, potassium, and manganese which can help regulate your digestive system.
It’s no wonder people have loved the flavors included in Pumpkin Spice for centuries! It makes perfect sense why we’d want to exclaim our love for pumpkin spice on a tote bag, right?
So grab your Cricut, download this free SVG cut file, and get to work!
The best part is that these free SVG files are available in the Tried & True Creative Library (our free resource library). All you need to do to access them is enter your email address into the form below, and we will send the pumpkin spice design straight to your inbox!
You can download the free SVG file below:

Making the Pumpkin Spice Tote Bag
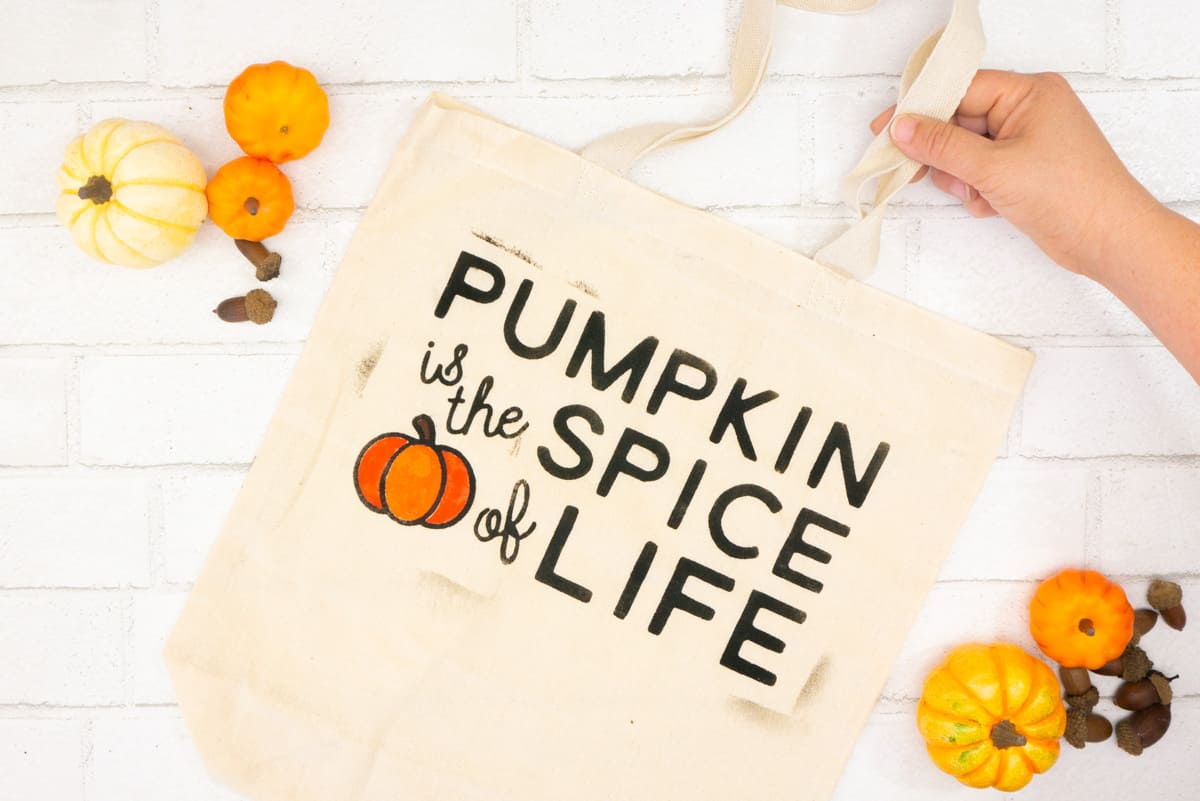
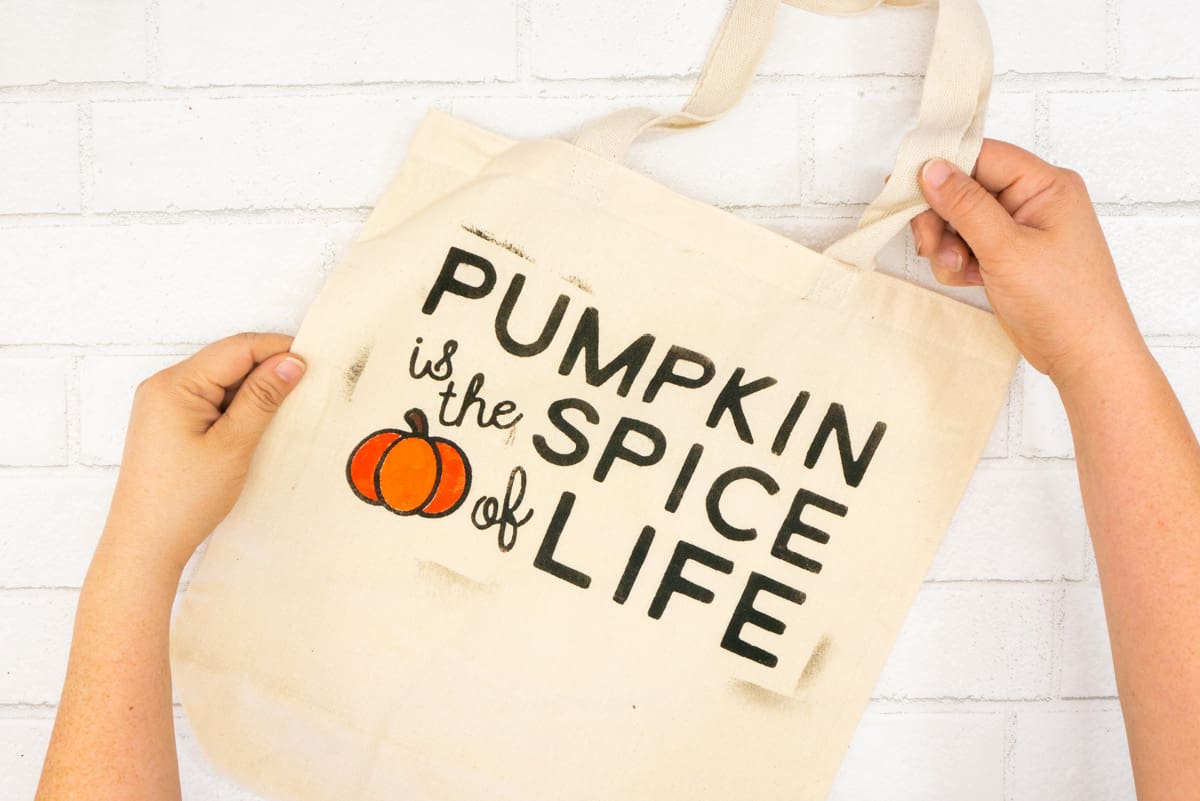
If you love everything about pumpkin spice, then I’ve got the ideal canvas bag painting idea for you. This pumpkin spice stencil tote is simple to make and will look fantastic when you’re out and about with your pumpkin spice latte!
This Pumpkin Spice Stencil is also a great idea for Halloween and Thanksgiving. You can use this stencil to create spooky designs or even paint on your favorite fall colors. So many ways you can customize this freezer paper stencil!
The design is simple to cut out with either a pair of scissors or a Cricut machine. This stencil will also make a great fall-themed tea towel or pillow cover if you don’t want to paint on the bag. You could even turn this pumpkin stencil into a reusable grocery bag with the right paint colors.
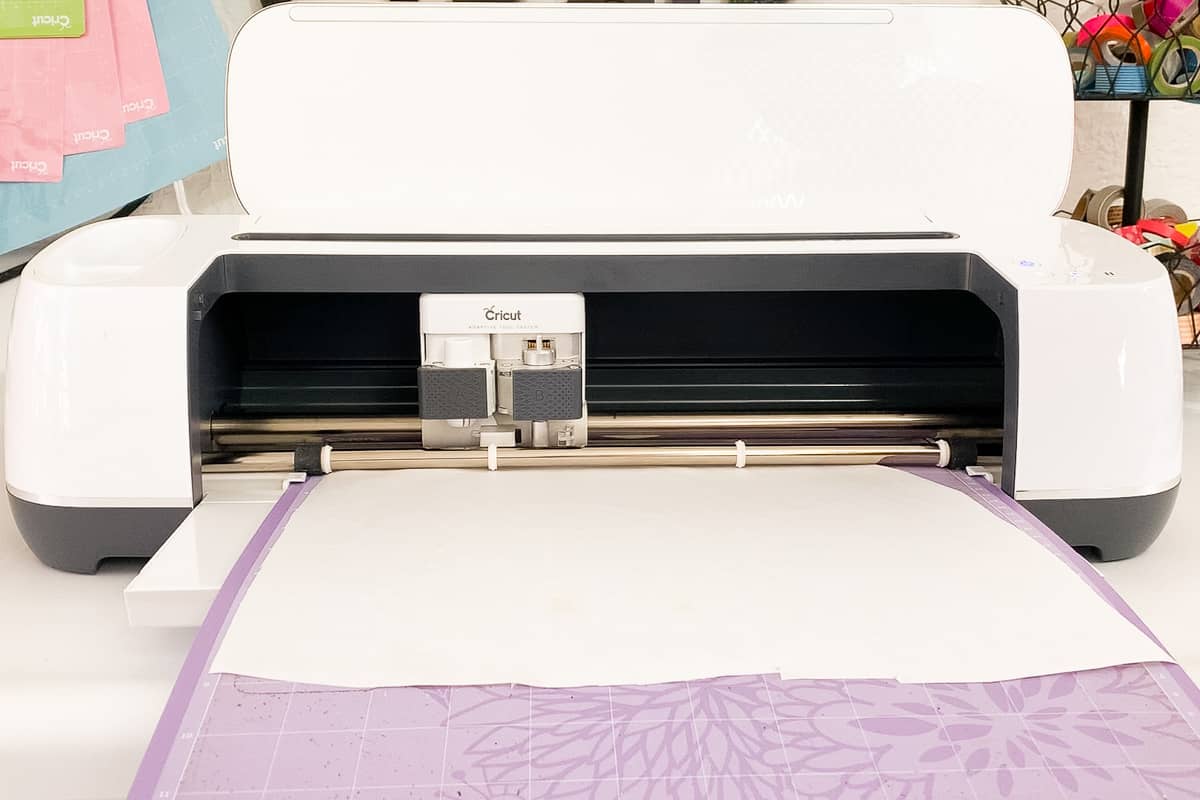
I used a digital cutter to save time on this project, but the design is simple enough that you may just as easily use an x-acto knife. You’ll want to have a cutting mat to protect your work surface. This tote is fantastic since you can customize the appearance with any colors you choose. So, grab your flannel and scarf, and let’s start welcoming back autumn!
You can watch a video of the entire process below:
Pumpkin Spice Freezer Paper Stencil Tote Tutorial
Materials you need:
- Blank Canvas Tote Bag
- Freezer Paper
- Fabric Paint
- Cricut Maker or Cricut Explore or Craft Knife
- Free “Pumpkin Is The Spice of Life” File
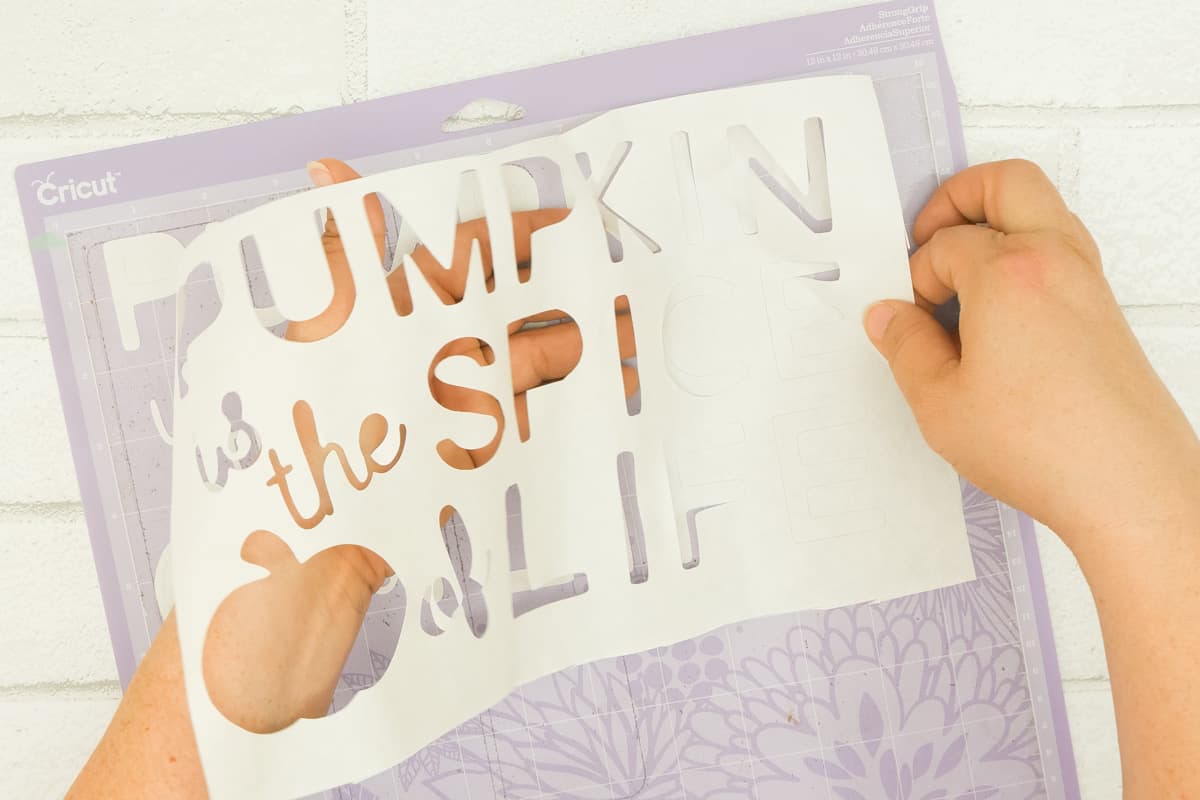
Step One. For this canvas bag painting idea, you’ll need to construct a freezer paper stencil. I uploaded the Free “Pumpkin Is The Spice of Life” free cut file into my Cricut Design Space software, but you may use any cutting machine (i.e. Silhouette or Brother) you like.
Step Two. Once the file is uploaded, cut a piece of freezer paper large enough to fit the mat and place the paper’s coated side (the shiny side) down. No need to mirror! Select “freezer paper” under the “Paper” section in Cricut Design Space. If your cutting machine doesn’t have this option, I’d suggest using a setting that works with thin paper.
If a digital cutting machine isn’t an option, you could use an 8.5″ x 11″ piece of freezer paper and a printer to copy the design. You can then cut out the image with a craft or Exacto knife. This method may take longer, but the design isn’t particularly challenging, so it’s totally doable!
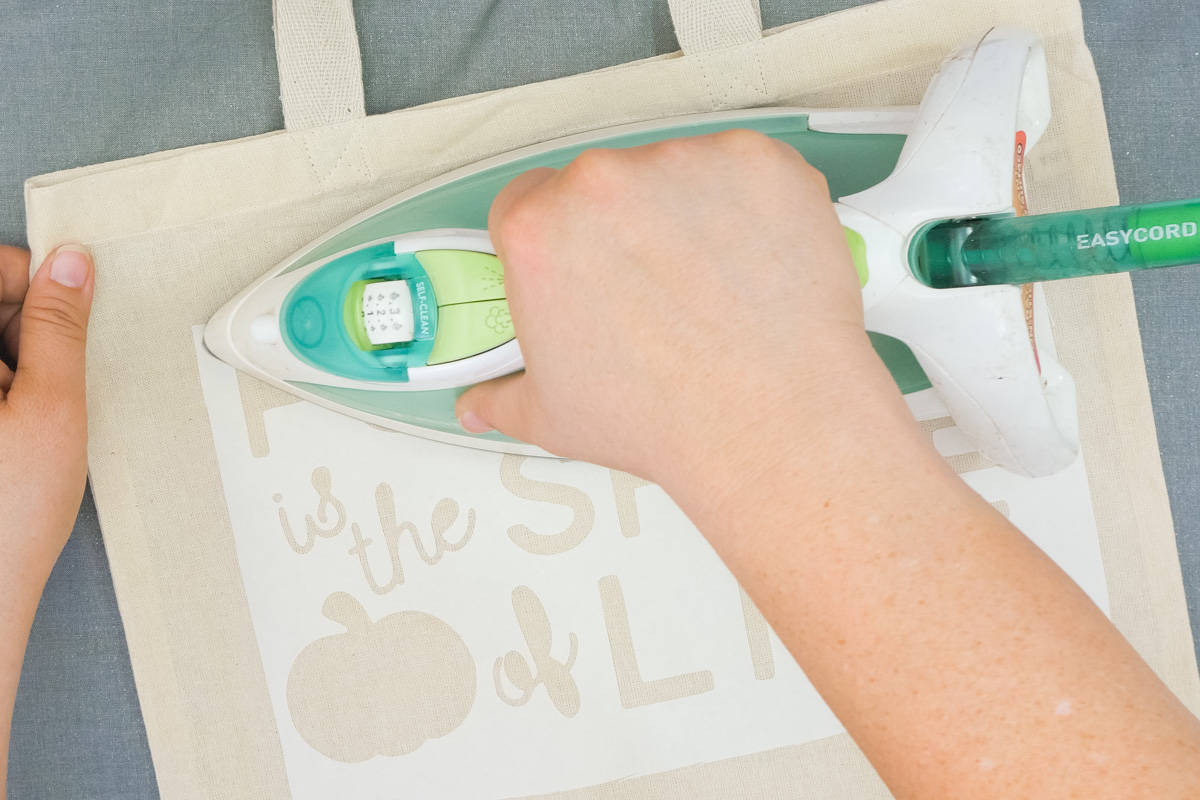
Step Three. Once your stencil has been cut, set it on top of your tote bag and apply it with a hot iron or EasyPress. Remember to include the little insides of the letters!
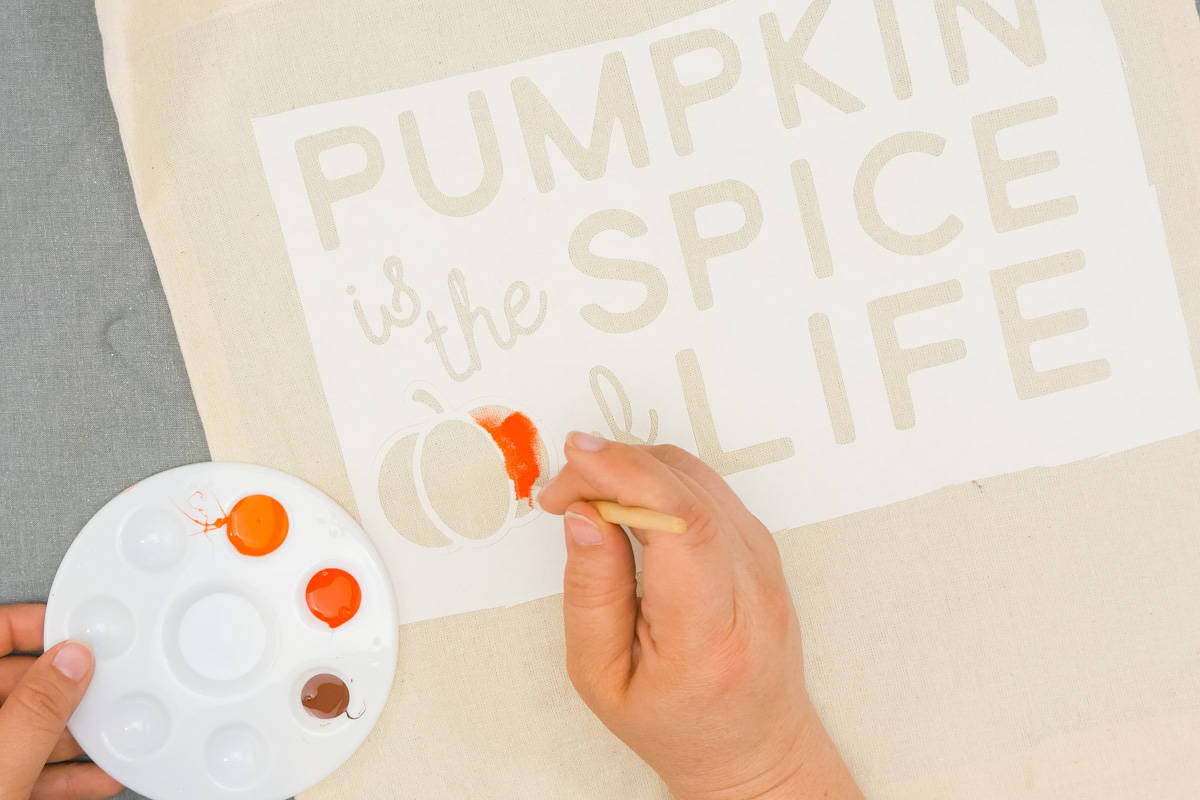
Step Four. Paint the inside of the pumpkin with orange and brown fabric paint, following the outline as a guide. I like to use a paintbrush or sponge designed specifically for stencil or foam brushes but feel free to use what you have on hand. You’ll want to dab the paint on with an up-and-down motion. Allow the paint to dry completely.
There are many options for which fabric paint to use at your local craft stores. You can either buy paint that can be used straight out of the bottle or buy an additive that can be mixed with regular acrylic paint. There’s even fabric spray paint! Just make sure to protect your entire surface before spraying, though.
Step Five. Iron the cut-out pieces of freezer paper onto the painted parts to cover and protect the pumpkin from the black paint we’ll be applying in the next step.
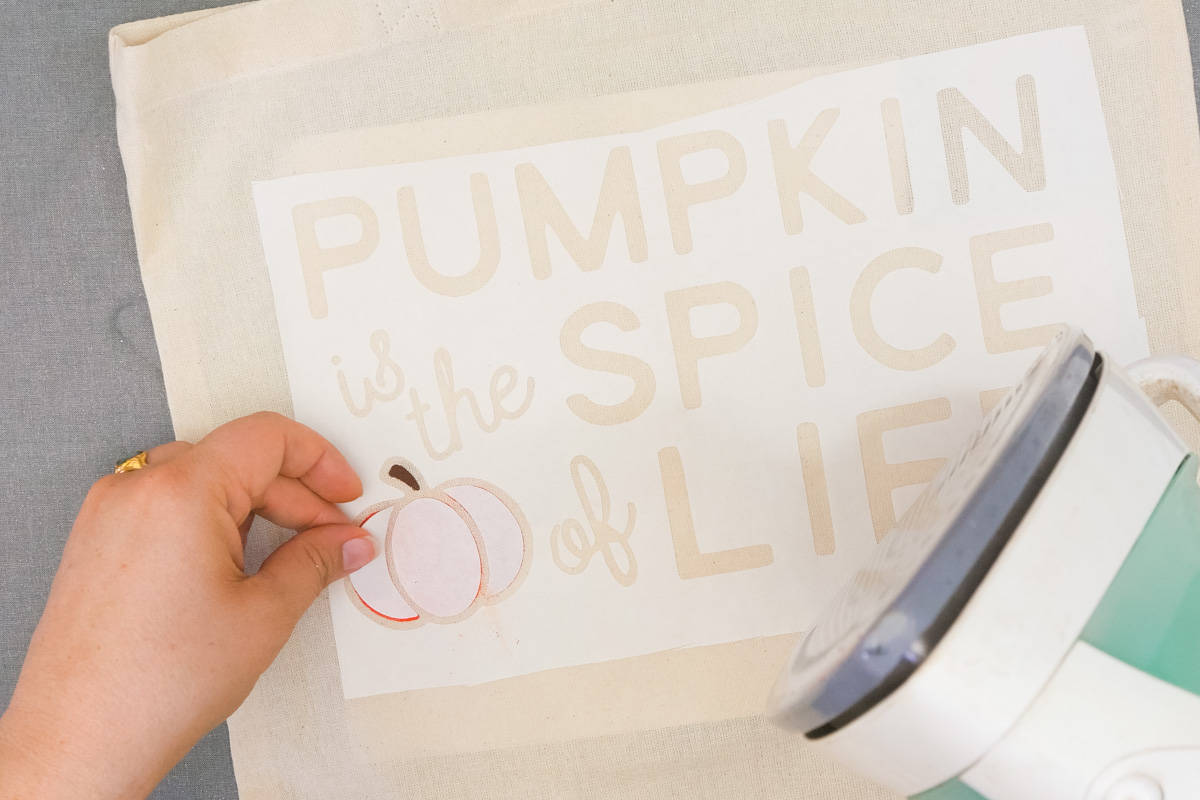
Step Six. To complete the pumpkin spice tote, apply black paint over the words and pumpkin outline after ironing the stencil in place.
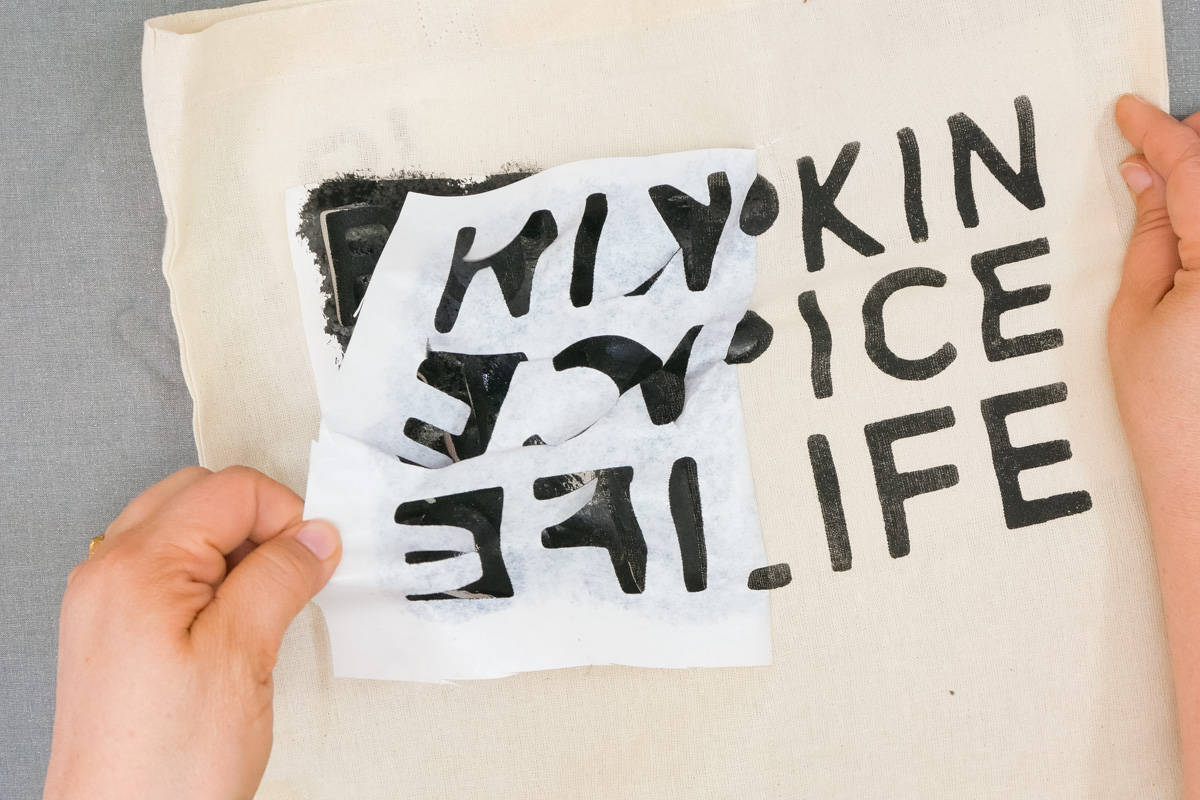
When the paint on top of the template has dried, carefully remove it from the tote. Make sure any paint on top of the stencil doesn’t get onto the fabric.
Freezer Paper Stencils are Awesome!
This article proved that freezer paper stencils are really easy to make and have endless design possibilities. I hope this article will inspire you to create and paint all your fall and holiday designs on totes, t-shirts, blanks, and more. There is almost nothing that you can’t use this method on!
There are many ways to use your Cricut, including making freezer paper stencils! If you’re looking for other ways to use your machine, check out the vast amount of tutorials and free SVG on our blog!
Don’t forget that you can find the SVG file linked in this article (and many more!) in the Tried & True Creative Library. Not a member yet? Just enter your information in the box above to gain access!
Thank you for reading and watching! What techniques do you use when stenciling? Let us know in the comments!
I hope you all have a fantastic day. Happy crafting, friends!


Leave A Reply!